If you've never grown garlic, here's how you do it: On a bright cool fall afternoon, before the ground has frozen, you pry an ordinary, unpeeled clove of garlic off the bulb. You plant it in the ground, about 4 inches down and pointy side up. Maybe you cover the soil with some straw to protect it from extremes of heat, cold and drought.
Then comes the easy part — you forget about it. Thanksgiving comes, and a procession of seasonal holidays in which a lot of garlic is eaten, but none is given much thought. Thus ignored, the buried clove sleeps on while you sample chocolates in February and when the maple runs in March. And then, one day while venturing out into the winter-battered garden, still frost-edged and filled with flattened weeds, you see it — a small firm shoot poking up out of the ground like a miniature dorsal fin, glowing a brilliant emerald in an otherwise plantless wasteland.
The shoot grows slowly, then faster as the mercury rises. The rains of April multiply its leaves, while below the unseen clove fattens and divides. The rains also bring weeds, and for the first time since planting you actually have to take a few minutes to care for your garlic by keeping it free of new grass and lambs-quarters. Otherwise it pretty much takes care of itself.
By late spring the plant is a foot and a half high, with a half-dozen leaves (one for every layer of skin that covers the bulb). And then — just when you're hunting for the first ripe strawberries — something odd happens. The garlic sends up a central stalk, chartreuse and pointy at the end, and it starts growing fast. It's called a scape. The scape shoots up and then goes serpentine — it begins to curl, forming one loop or maybe even two. There's a bump toward the end of the scape, and if you leave it alone it will develop into a "bulbil" (which is not a hobbit, but a miniature garlic you could plant if you wanted).
Don't let things get that far; instead, snap off the scape when it's done curlicuing. It's the gardener's dividend, and it is a rich one. The taste of that green garlic is haunting — biting, fresh, vegetal and verdant. It is to mature garlic what a string quartet is to an orchestra; what a sonnet is to a novel.
The scape's texture is a little like asparagus, and you can use it in the kind of stir-fry you normally start with crushed or pressed or minced or sliced garlic cloves. As far as I'm concerned, garlic scapes qualify as a vegetable, and you need to add little more than a handful of protein to make a fragrant and memorable one-pot meal. Some people like to pickle them and some like to puree them into soup. I like to throw them in my morning fried rice (always a random, opportunistic mixture of the leftover and the in-season).
The taste of that green garlic is haunting — biting, fresh, vegetal and verdant.
But by far the easiest and most popular way to use garlic scapes is to turn them into scape pesto. I think of it as "don't have to" pesto. I don't have to use garlic, because the scapes are garlic. I could use basil, but I don't have to. I could hunt down pine nuts instead of whatever's around, and I could toast them, but I don't have to. I could use both Pecorino Romano and Parmigiano-Reggiano, but I don't have to. And I not only don't have to use a mortar and pestle, I can't. So the scapes and the oil and whatever nuts or cheese all get thrown in the food processor, willy-nilly. Although the lack of care I've just described is probably criminal, it still tastes great every time.
For just these couple of weeks, the scapes yield bonus after bonus. And then, suddenly, that's it. The de-scaped garlic plant continues to grow and the bulb continues to ripen, until one day in July when you notice that two of its six or seven leaves have yellowed and withered. On a sunny, breezy afternoon — the kind that kites are made for — you uproot the fat bulbs, knock the dirt off of them and hang them somewhere cool and dry.
The very fattest you save for seed, for garlic grows better from year to year as it gets used to the conditions of your garden. While the kids sleep off their Halloween binge, you drop them in the ground, to be forgotten again. Until next spring — when that first bright emerald sighting once more jogs your memory, sending up a beacon of hope and dreams of scapes to come.
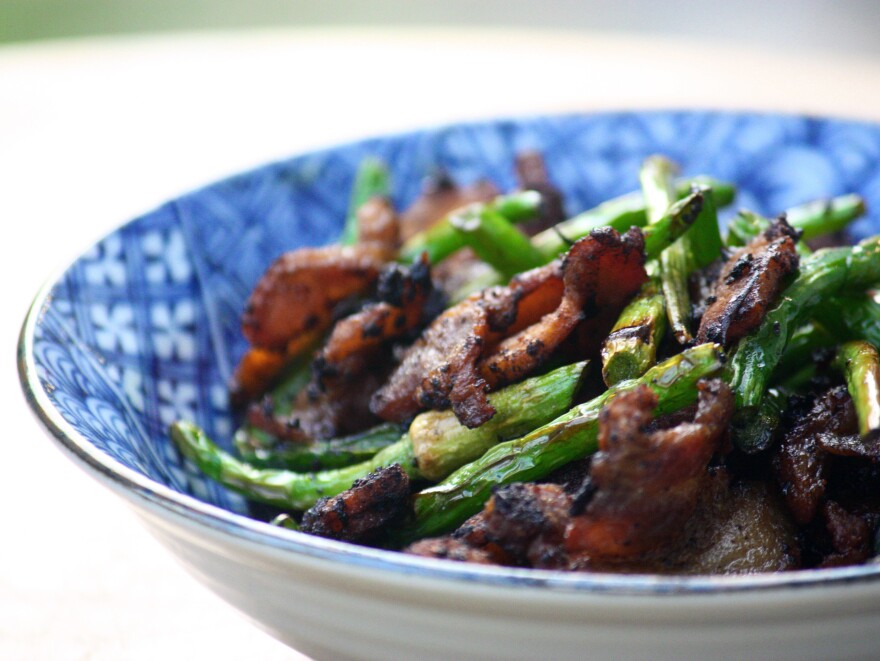
Recipe: Pork And Garlic Scape Stir-Fry
This recipe is very loosely adapted from Fuchsia Dunlop's Every Grain of Rice (Norton, 2013), a terrific collection of Chinese weekday stir-fry essentials, in case you're looking for one. I've reduced the amount of oil. You only need a little bit to start things off, since pork belly will oil itself nicely as soon as it heats up. You can find the chili bean paste and fermented black beans at Chinese groceries, or Asian grocery stories with a good selection of jarred Chinese condiments. You could stir-fry the whole thing at once rather than in two batches, but the textures and colors won't be as vivid.

Makes 4 servings, with rice
1 pound pork belly, skin removed (you can ask your butcher to do this if you don't want to do it yourself)
2 dozen garlic scapes
2 teaspoons oil or lard
Pinch of salt
1/2 teaspoon sugar
2 tablespoons Sichuan chili bean paste (also called broad bean paste with chili or tou ban jiang)
4 tablespoons fermented black beans, rinsed and drained
Cut the pork into slices about 1/8- to 1/4-inch thick, each with a good mixture of fat and lean. If you need to firm up the pork for slicing, just stick it in the freezer for 10 minutes. Cut the garlic stems into 1 3/4-inch sections, discarding any fibrous parts at their bases.
Heat a wok over a high flame. When hot, add 1 teaspoon of the oil. Add half the pork, reduce the heat to medium and stir-fry until the slices are just curved and tinged with gold and the oil is clear, adding a pinch of salt about halfway through the cooking time.
Use a wok scoop or slotted spoon to move the pork to one side of the wok. Add half the chili bean paste and half the black beans to the oil that pools in the space you have created. Stir-fry them briefly until the oil is red and fragrant. Then mix everything together, add 1/2 the sugar and then half the garlic scapes.
Increase the heat to high and stir-fry until the garlic scapes are cooked (they will appear slightly blistered and a brilliant dark green, and when you taste one, the pungency will have mellowed to a sweet garlickiness). Transfer to a serving bowl.
Repeat with the remaining half of the ingredients and serve.
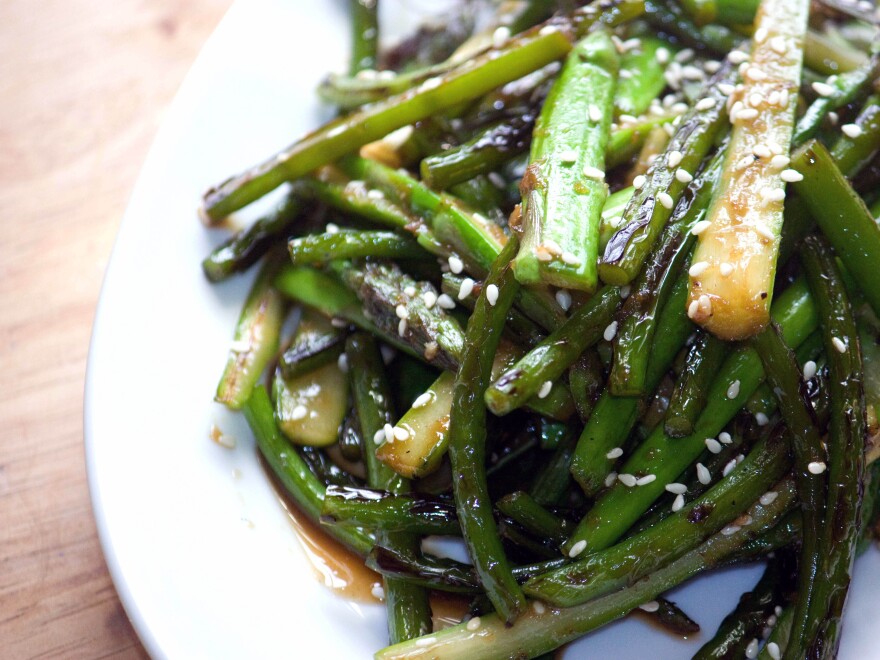
Recipe: Sesame Ginger Scapes And Asparagus
If you can only get medium or thick asparagus, never fear. The asparagus from my garden comes in all different sizes at the same time, so I split the thicker stalks lengthwise down the middle (in half if you've got medium asparagus, in quarters if it's superthick) and proceed as directed. For this recipe, I prefer tamari to soy — it's a little less salty and drying — but I've used soy in a pinch.

Makes 4 servings as a side dish
1 1/2 tablespoons vegetable oil
1 dozen garlic scapes chopped into 2-inch lengths
1 small bunch of pencil-thin asparagus, chopped into 2-inch lengths
1 1-inch knob of ginger, peeled and grated to yield about 1 teaspoon grated ginger
1 tablespoon tamari sauce
2 tablespoons mirin
1/2 teaspoon toasted sesame oil
About 1 tablespoon white sesame seeds, to garnish
Preheat a wok or large, heavy cast-iron skillet over a high flame until it's quite hot (a wisp of smoke may rise from the hot pan). Add the oil, followed immediately by the chopped scapes. Stir-fry for 2-3 minutes, until the scapes are aromatic and dark green, but not yet blistered.
Add the asparagus pieces and grated ginger together and continue stir-frying for a minute or two, until the asparagus has just softened and the ginger has released its fragrance. Don't overdo it — you'll have a chance to cook it further at the end if it's not quite done.
Push the greens to the side of the pan and add the mirin and tamari together. Reduce just a little, until the liquid bubbles and becomes a bit syrupy. Toss with the greens and shut off the heat. Add the sesame oil and toss a final time before garnishing with the sesame seeds and serving.
Recipe: Scape Pesto (Or 'Don't Have To' Pesto)
A food processor is better than a blender for scape pesto, because you need the wider surface area to chop up the scapes. Warning: This is a pungent, supergarlicky pesto because the scapes are raw — I like it that way, but then again I'm not going on a first date tonight. If you'd like a mellower, tamer pesto, try blanching the scapes for 1 minute in boiling water before adding them to the food processor.

Makes 4 servings, enough to serve with 1 pound dry pasta
2 dozen garlic scapes
Kosher salt, to taste
1/3 cup toasted pine nuts or other nuts
Handful of basil (optional)
1/2-3/4 cup olive oil
1/2 cup grated Parmigiano, Pecorino Romano or a combination
Chop the scapes very roughly, into about 4-inch lengths. Pulse the chopped scapes in a food processor, scraping down the sides a couple of times, until they've broken down into pungent, juicy bits, kind of like an eye-watering risotto. Salt to taste. Add the pine nuts and basil, if using, and pulse a few more times until distributed and flecked throughout.
Now run the processor continuously as you drizzle in the olive oil from above through the feeder tube. Stop once or twice to scrape down the sides. Stop when you achieve your preferred consistency — I like a rustic, rough scape pesto, but you can process it right down to a smooth puree if you don't mind adding quite a bit more oil.
Finally, add in the cheese and pulse just to combine. If you're not using the pesto right away, scrape it into a bowl and cover with plastic wrap, laying the wrap right against the surface to prevent discoloration.
Copyright 2021 NPR. To see more, visit https://www.npr.org.

